
ALT
Manual
A guide on how to play ALT
and how to guide ALT to play itself
Synthesizers
are magical instruments
they turn electricity into sound, and into emotions.
ALT is a special one, it feels alive.
you can play it in different ways, feed it different waves, even light and sound.
ALT can be played, but it can also be guided to play itself, creating ever evolving melodies and rhythms.
your role then, if you please, is to help it find its way through these soundscapes.
this guide is here to give you a few ideas to get started.
we hope you will enjoy playing ALT as much as we enjoyed making it.
love,
vincent & vincent
1.
Table of contents
2.
Overview
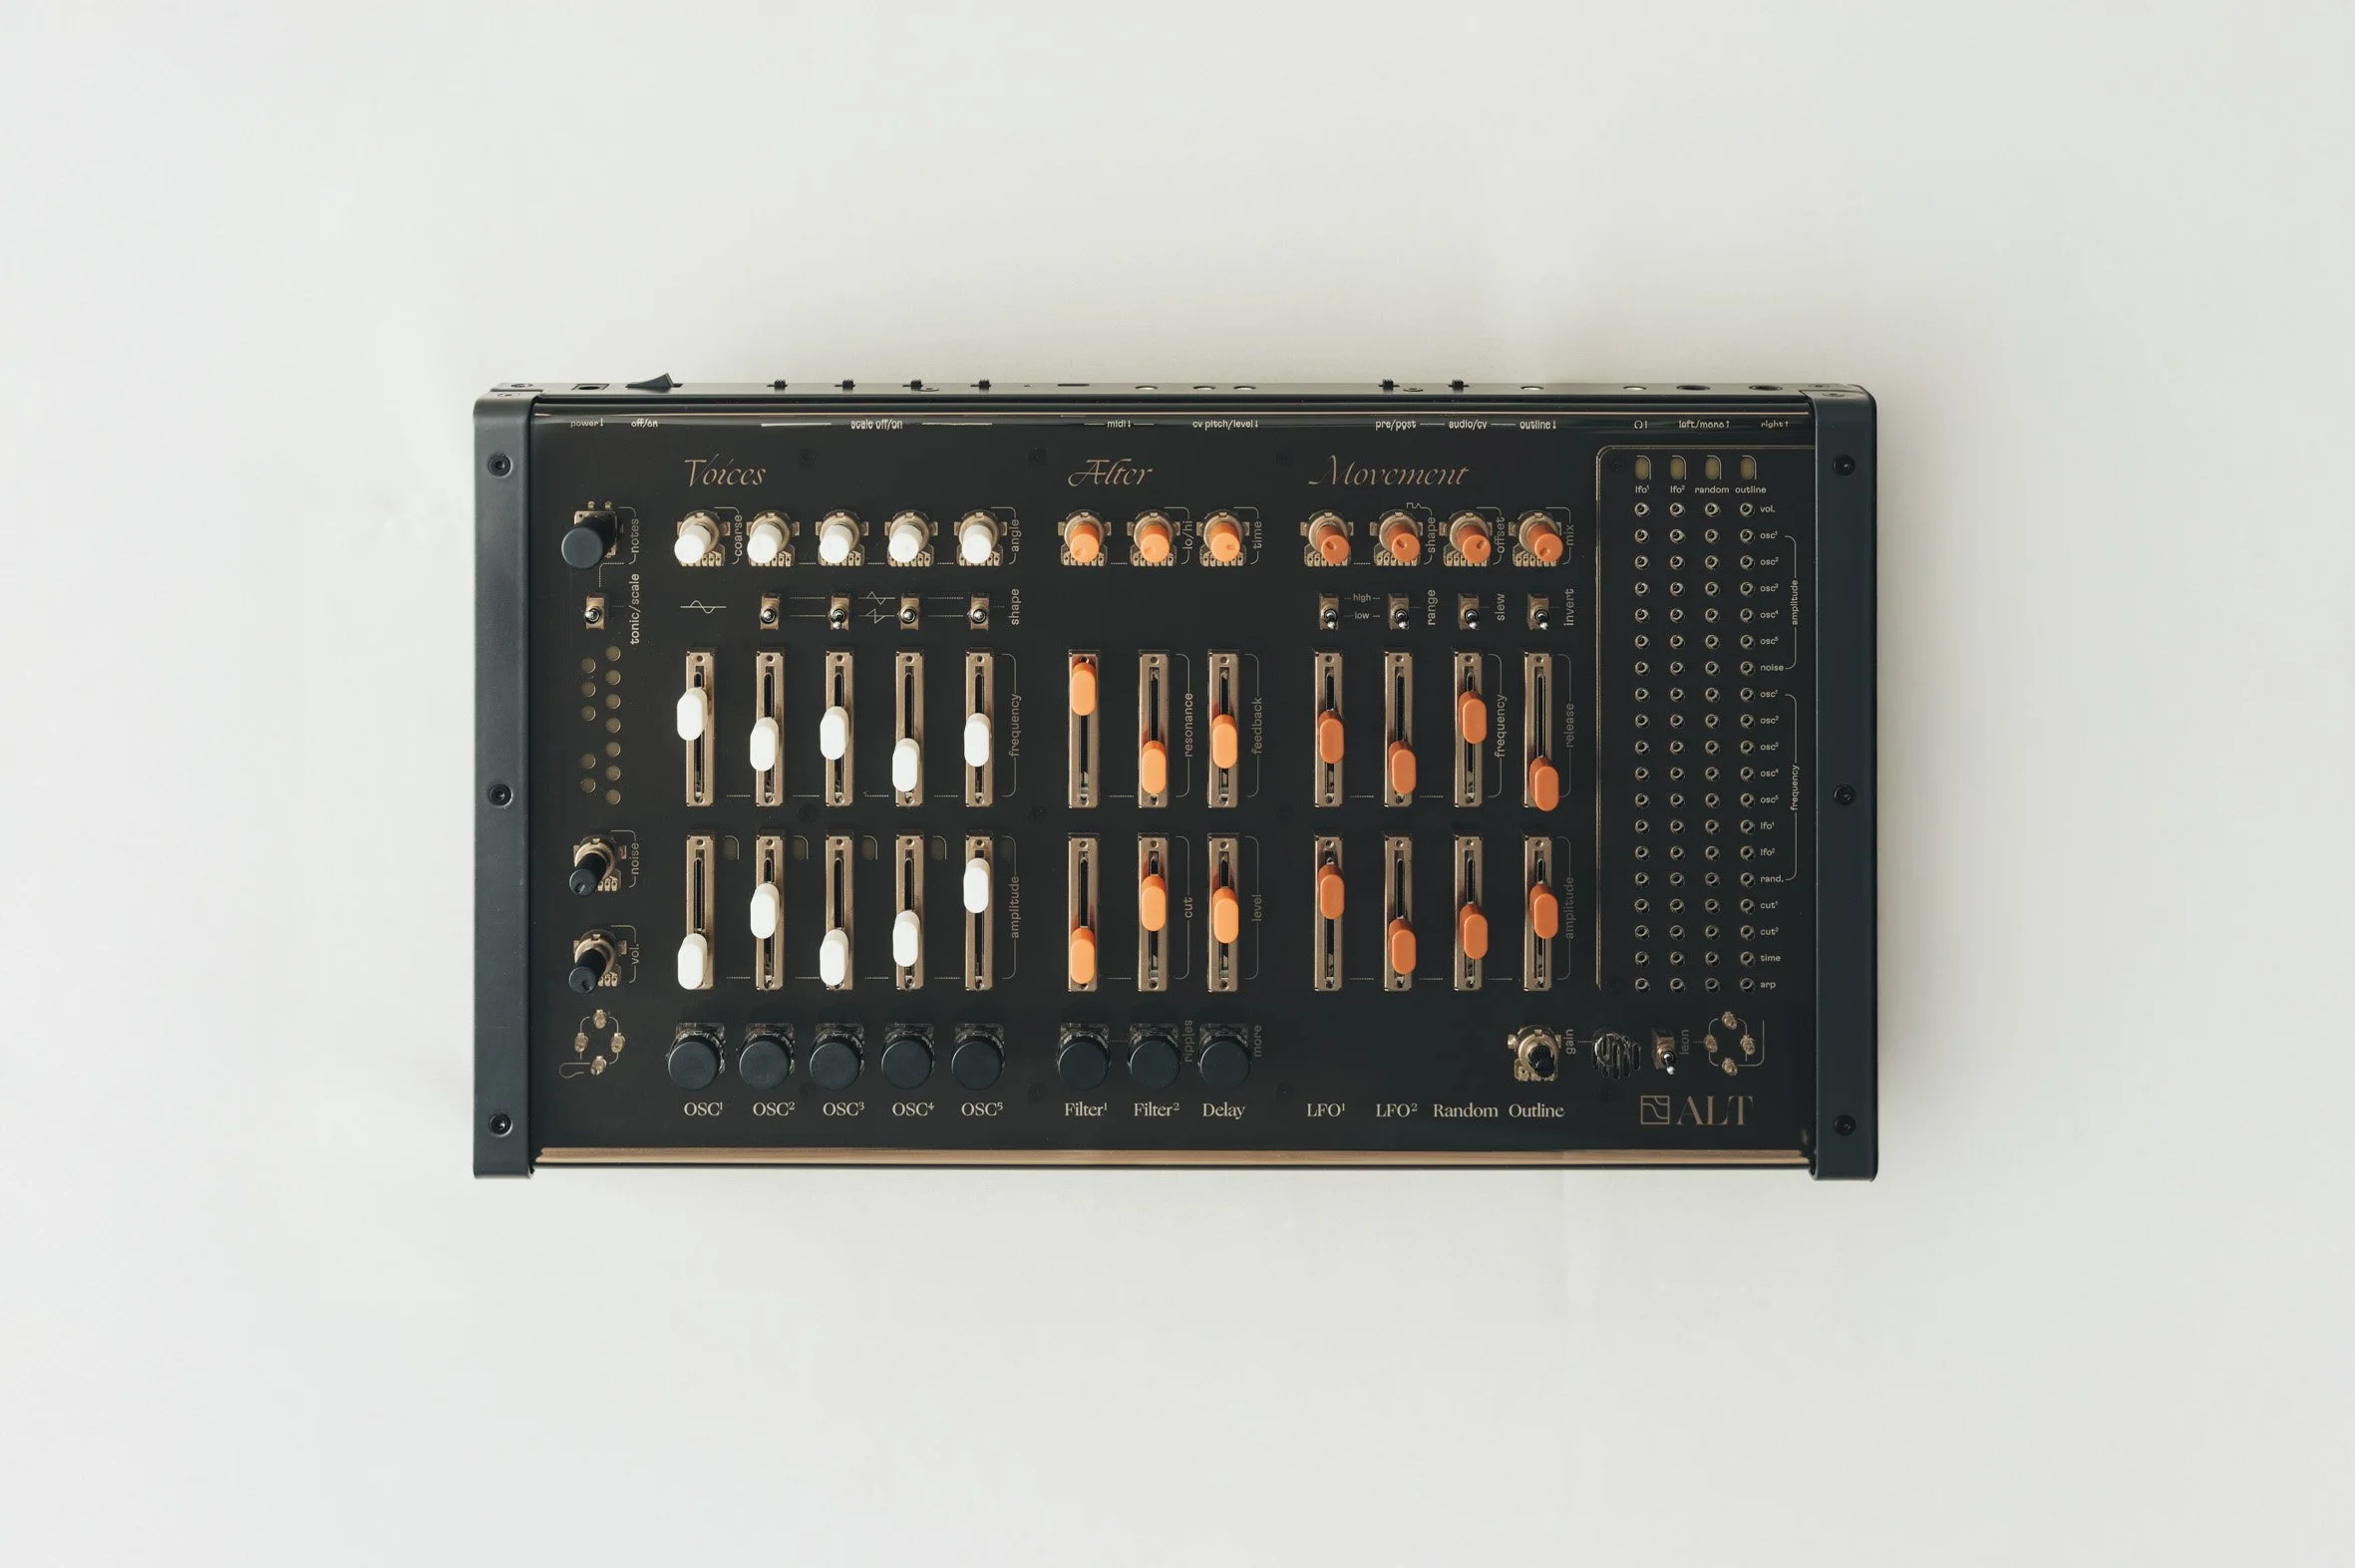
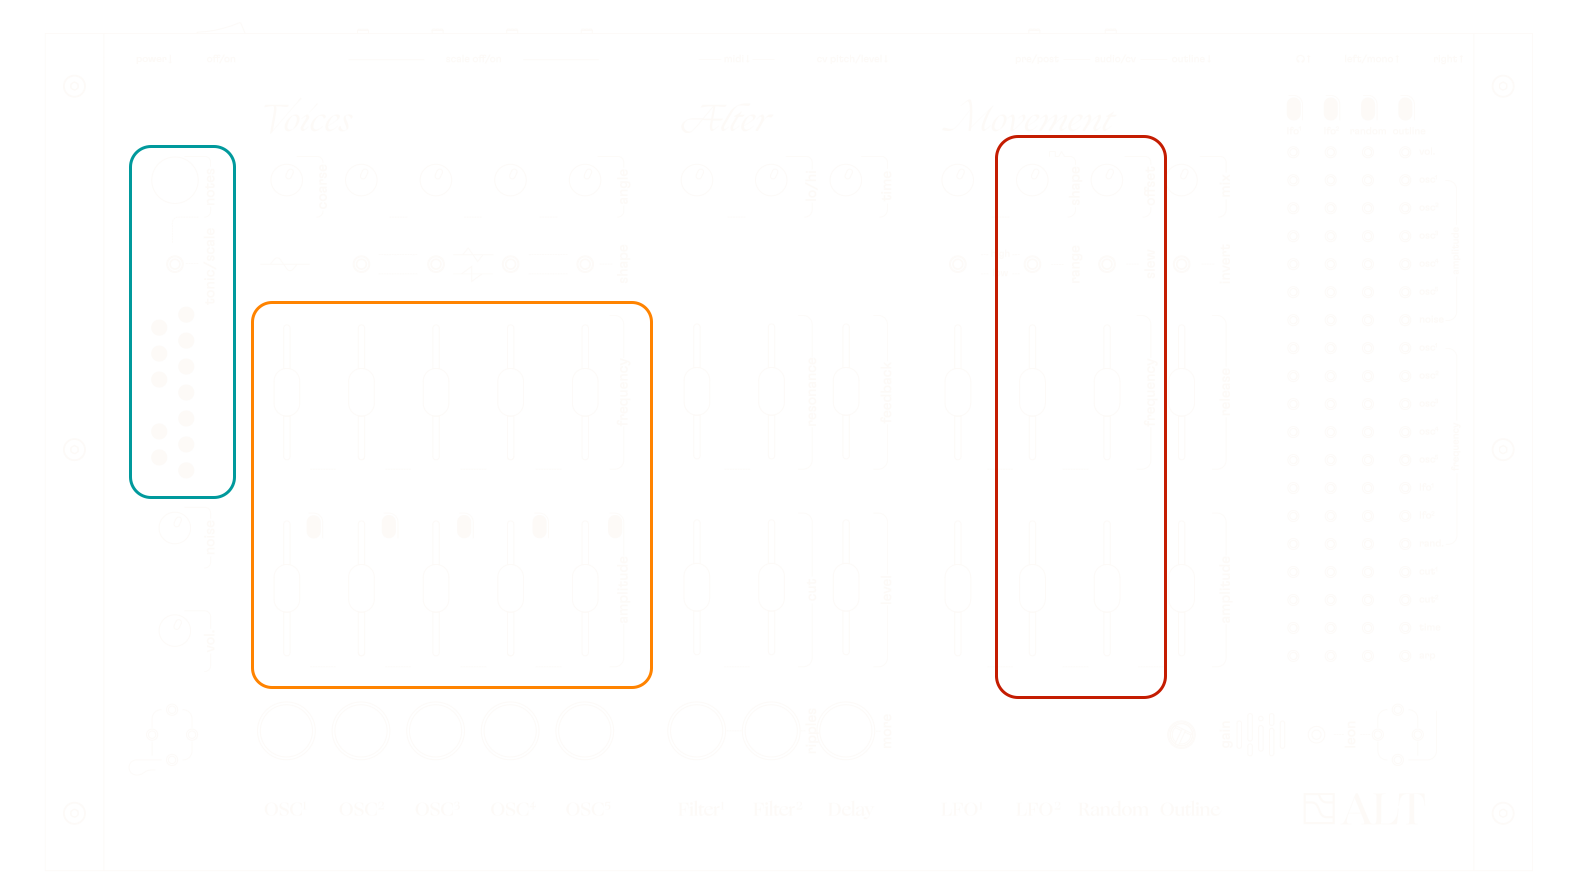
ALT has no screen, no shift button. every tweak you make has a direct impact on the sound.
every function is arranged in a vertical column - their names are written underneath.
-
this is where the sound is created.
5 oscillators, each with their own specifications. play with different waveforms, different ranges, different stereo angles.
play them rhythmically or continuously, with free linear frequencies or quantized notes.
-
this is where the sound is given its character.
2 filters allow you to cut off certain frequencies,
and a delay gives space to your sound. -
this is where the sound is set in motion.
this section is made of 4 modulation sources that you can assign to 19 different parameters of ALT using the pin matrix.
assigning different modulation sources to different destinations will create intricate rhythms and melodies.
3.
4.
Quick patch
make a sound
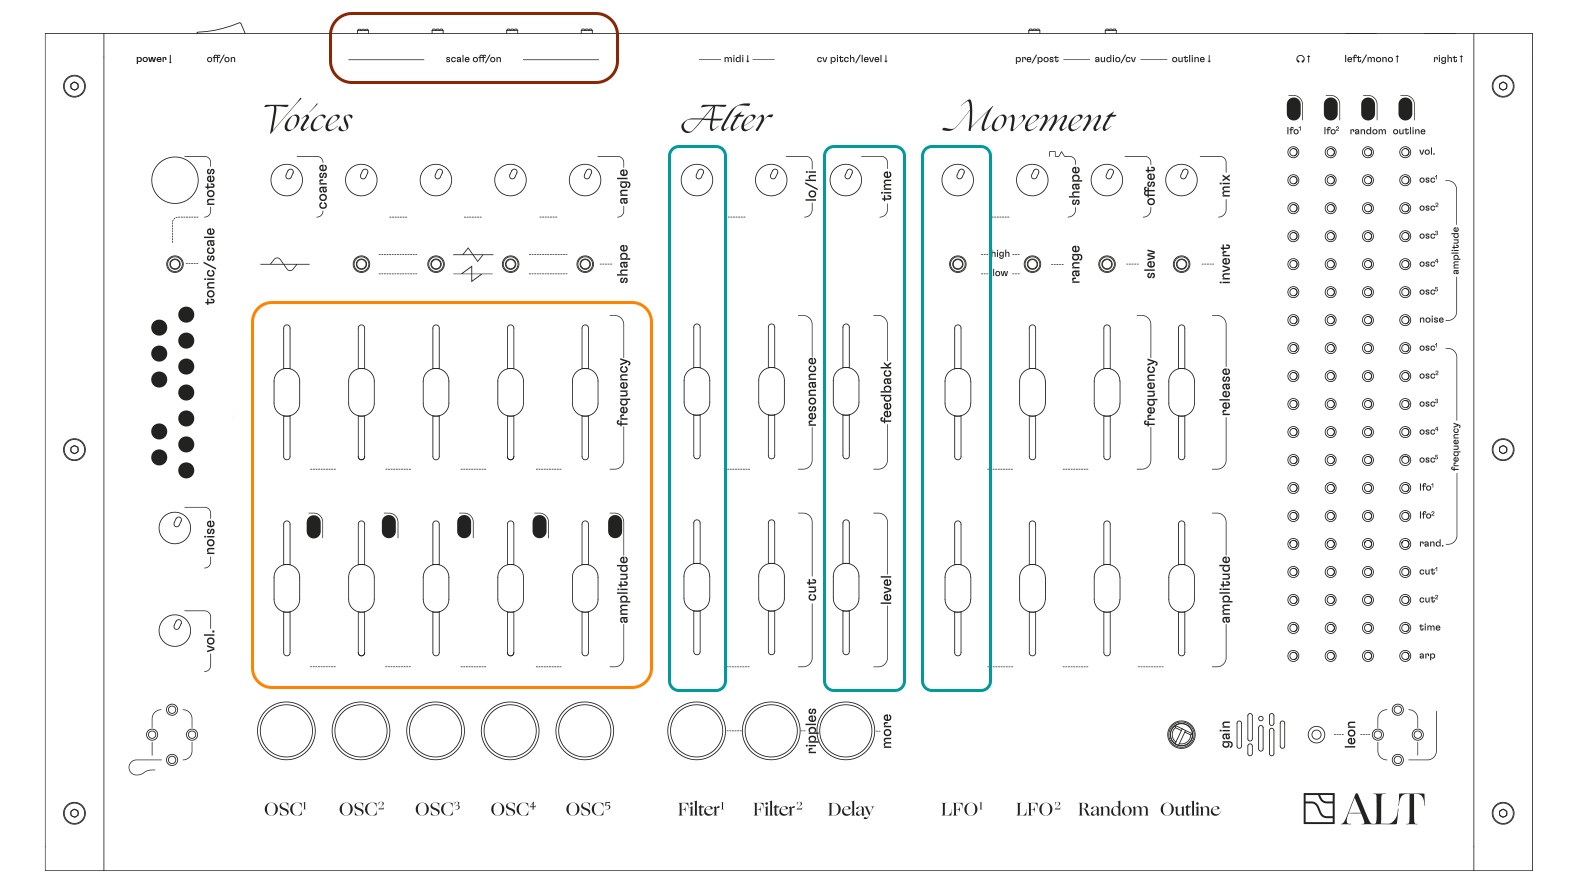
here’s a simple patch to get started. plug the power supply in and the audio jacks out.
turn it on, and turn up the volume.
make sure the 4 scale switches on the back are on (right),
filter cut sliders are up, filter lo / hi knobs are all the way left, and leon switch is off (down).
push up the amplitude sliders for oscillator 3, 4, and 5, and then their frequency sliders, until you find a chord you like.
shape it
play with the first filter cut and resonance (be careful not to push it to the max!).
turn up the delay level and feedback around halfway, and play with time.
here’s your sound material, now let’s make it evolve.
insert a pin on the matrix between lfo 1 (first column) and cut 1 (filter cutoff) for example.
now play with the lfo 1 amplitude, frequency, and shape.
5.
another pin, let’s say between random (3rd column) and oscillator 5’s frequency (12th row).
play with the random amplitude, frequency (halfway is nice), and offset (offset default position is at noon).
do you hear a melody?
let’s change it: select scale on the tonic/scale switch, and turn the notes knob to scroll through different scales, click notes to select one.
you can also click, hold, and turn notes to quickly edit the scale.
ok now play with the oscillators 3, 4 and 5 angle knobs (pan), and try pushing the delay more button.
let’s add a few pins: maybe lfo 2 into oscillator’s 5 amplitude (turn up lfo 2 amplitude and frequency) to introduce tremolo, and maybe lfo 2 into lfo 1 to cross modulate the filter?
now the search is in progress...
make it evolve
6.
Voices
volume
ALT master volume level..
noise
white noise amplitude level.
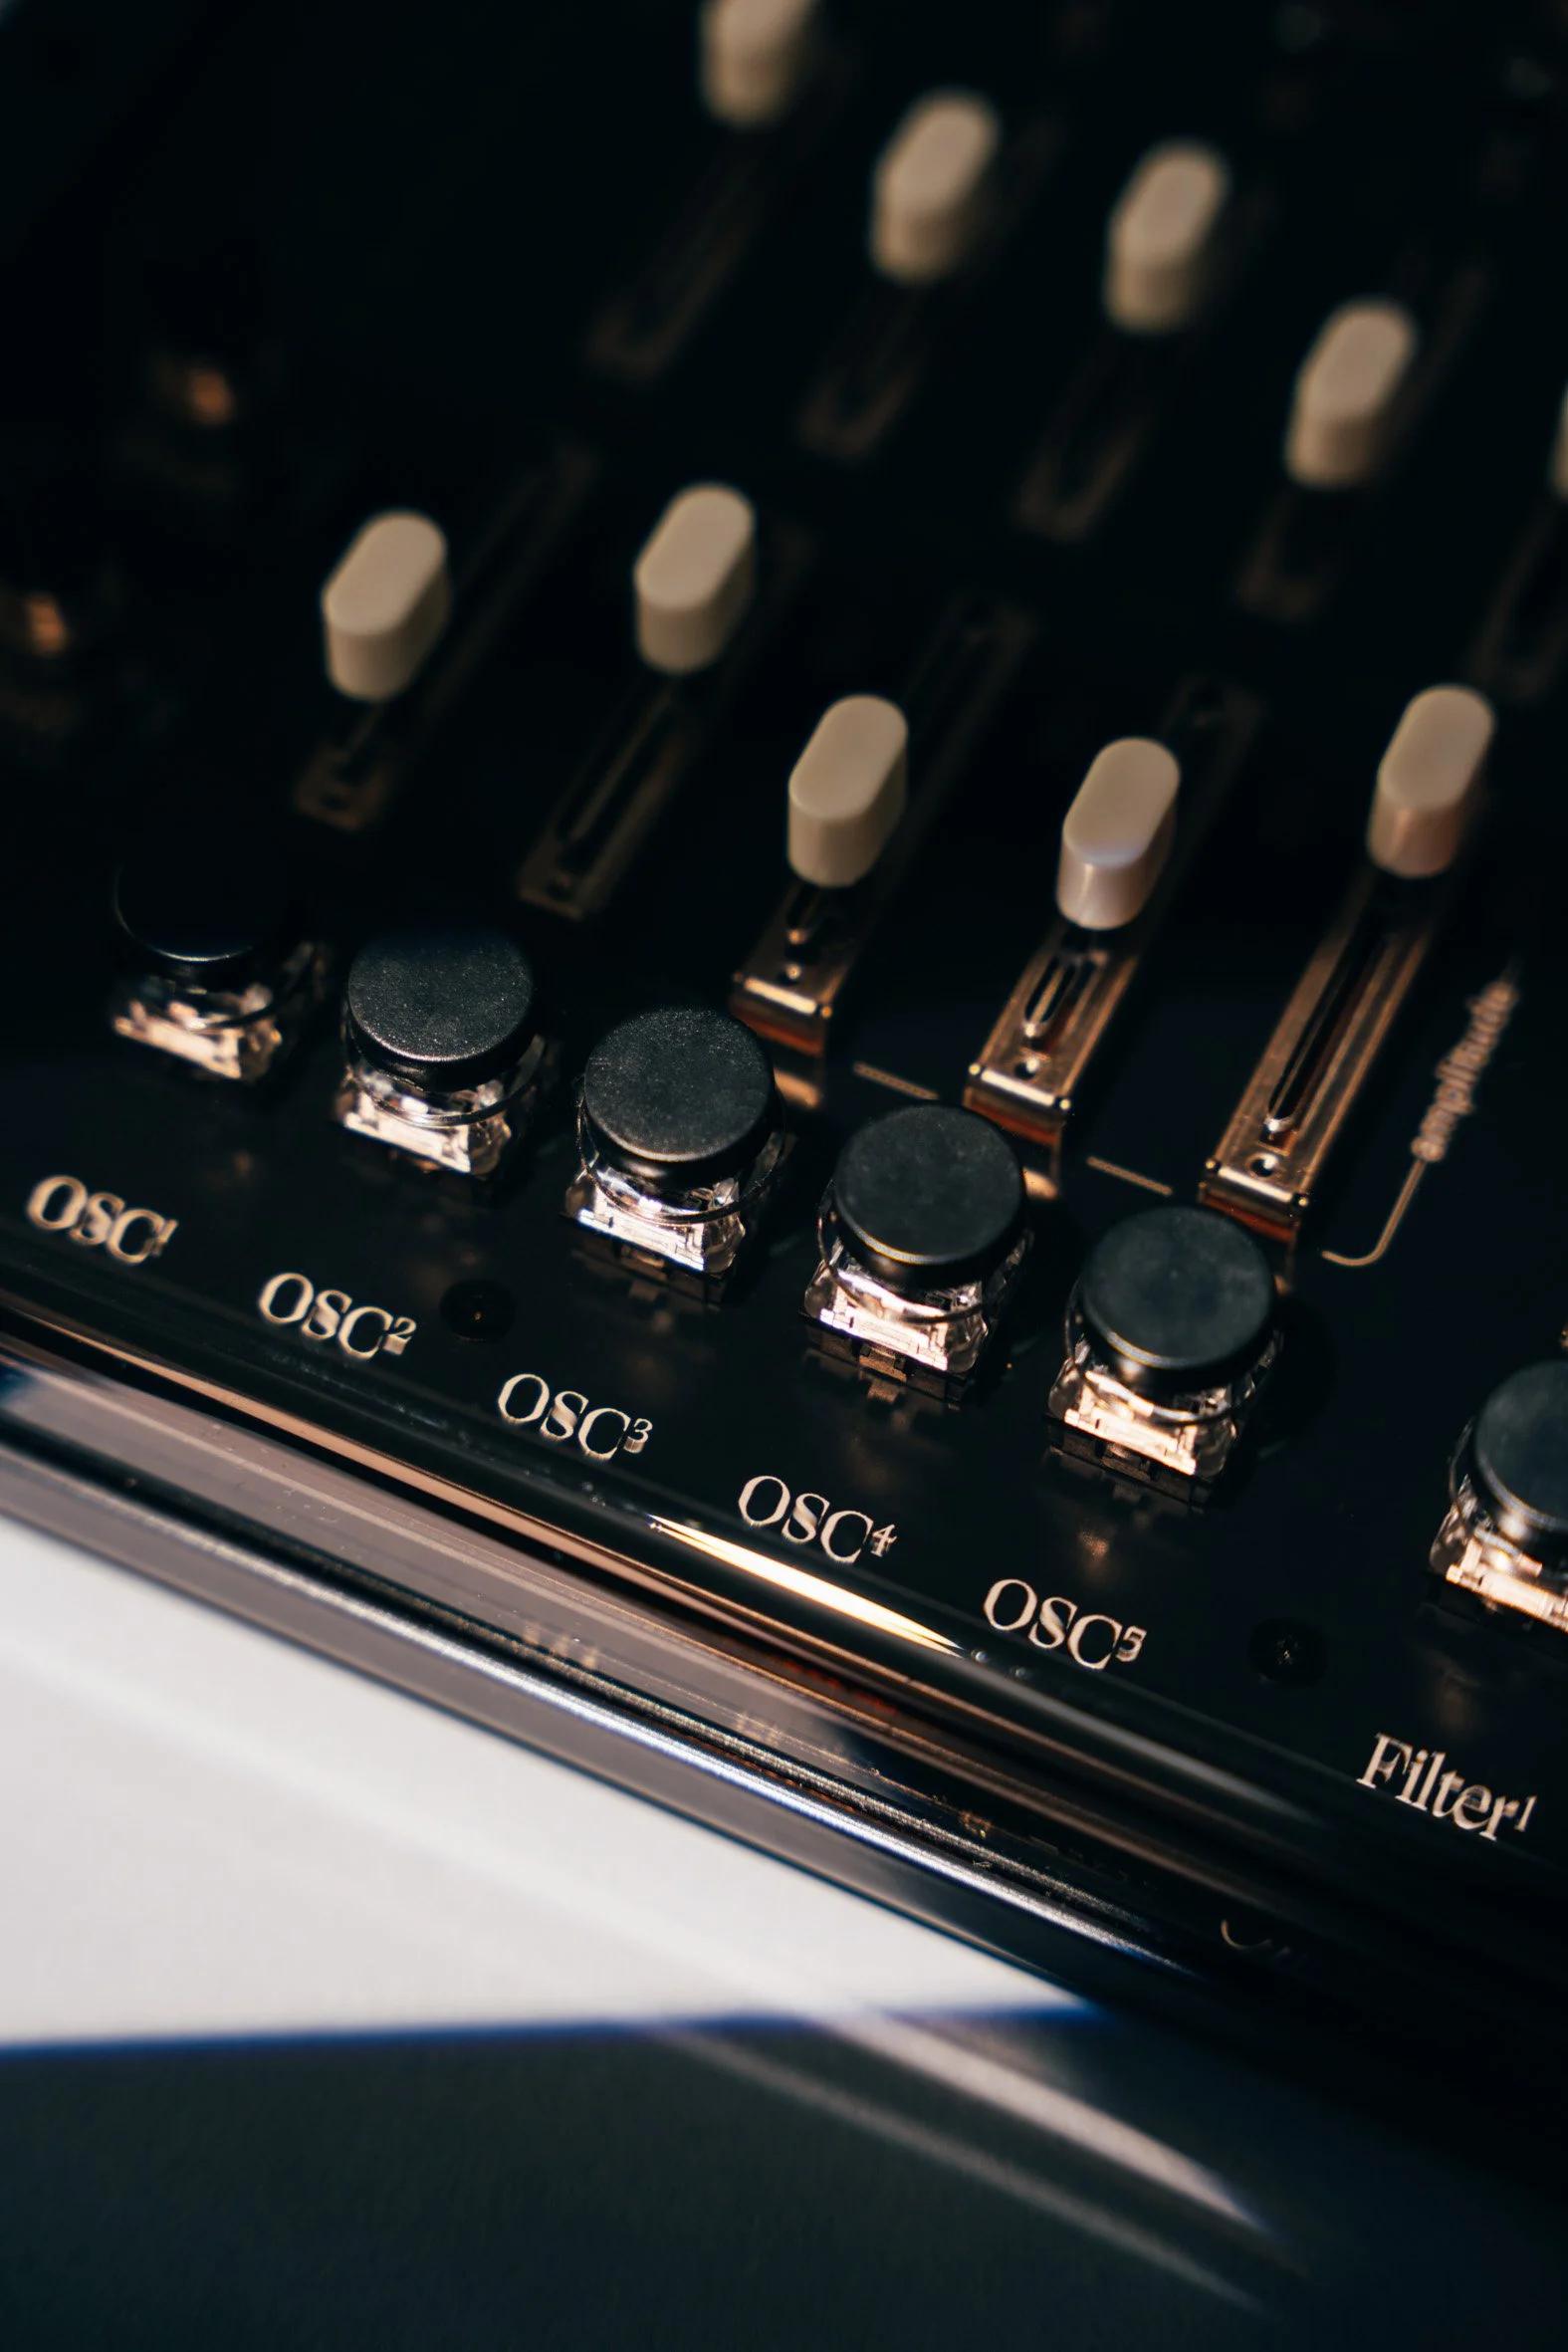
oscillator 1
VCO (voltage controlled oscillator)
oscillator 1’s shape is always a sine wave.
its frequency is always free, meaning its pitch changes linearly.
it can never follow scales.
useful for deep bass and constant drone sounds.
→ push buttons: triggers amplitude, like a key on a keyboard
→ amplitude: sets the volume level of the oscillator
→ frequency: sets the pitch- 1.5 octave
→ coarse: also sets the pitch- 8 octaves
oscillators 2 to 5
DCOs (digitally controlled oscillators).
these oscillators can be free or follow scales.
oscillator 2 is one octave lower
and oscillator 5 one octave higher than oscillators 3 and 4.
→ scale on/off switches, on the back of ALT: define whether each DCO frequency is free (linear pitch change) or is quantized to the nearest note within the selected scale (stepped pitch change).
→ push buttons: trigger amplitude, like keys on a keyboard
→ amplitude: sets the volume level of the oscillator
→ frequency: sets the pitch - 2 octave range
→ shape: changes the waveform - triangle or sawtooth
→ angle: is the stereo panning control - noon for center.
7.
Scale and tonic mode
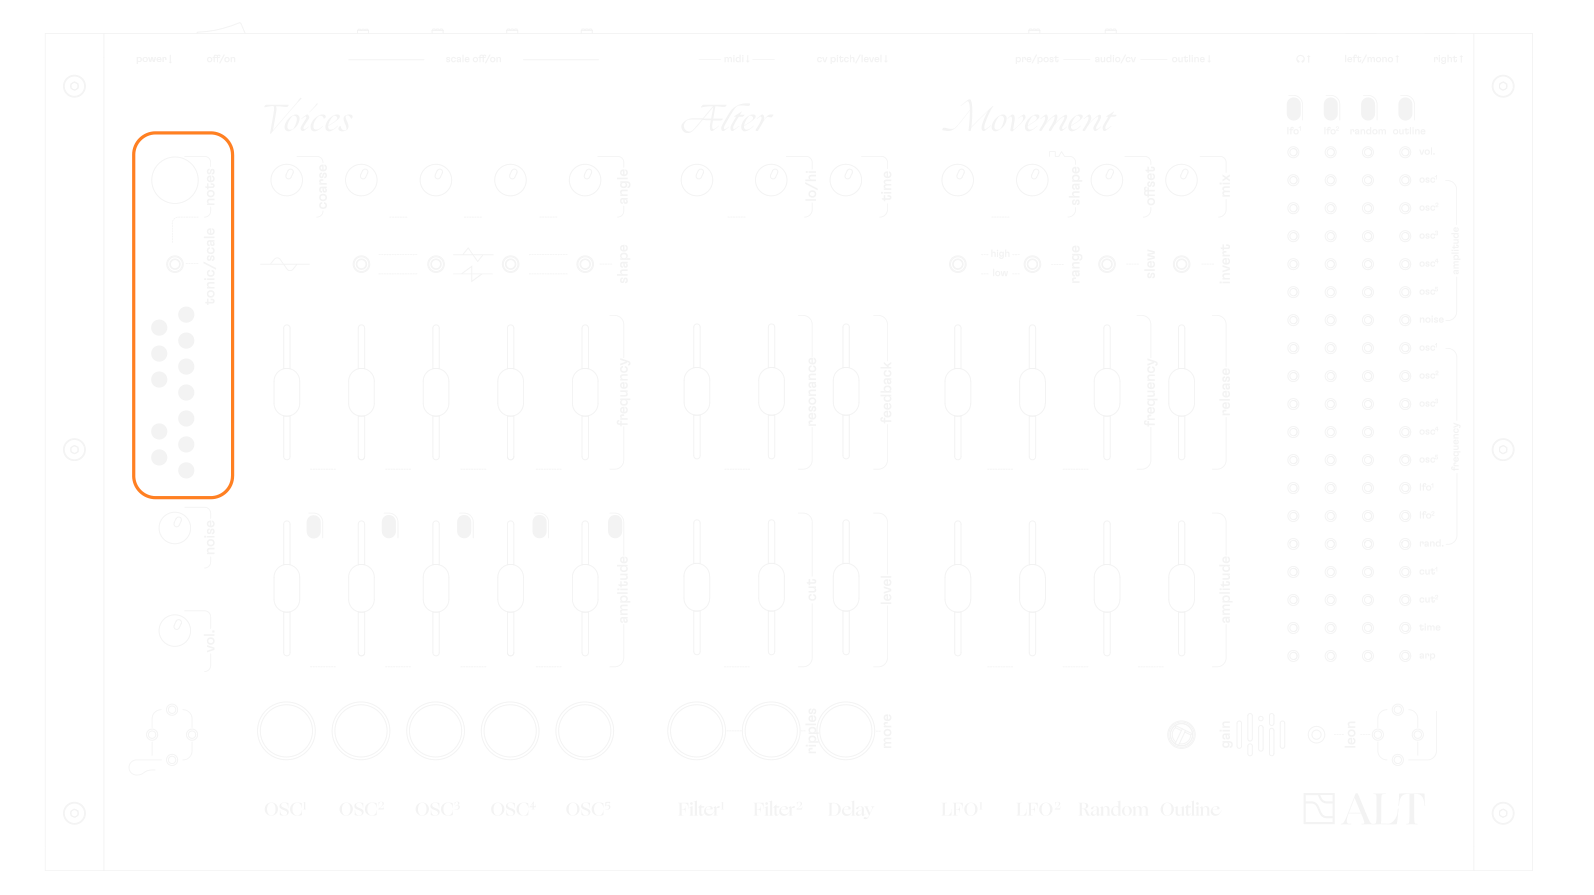
the tonic / scale switch and the notes knob are the brain of ALT, dedicated to managing the frequencies of oscillators 2 to 5.
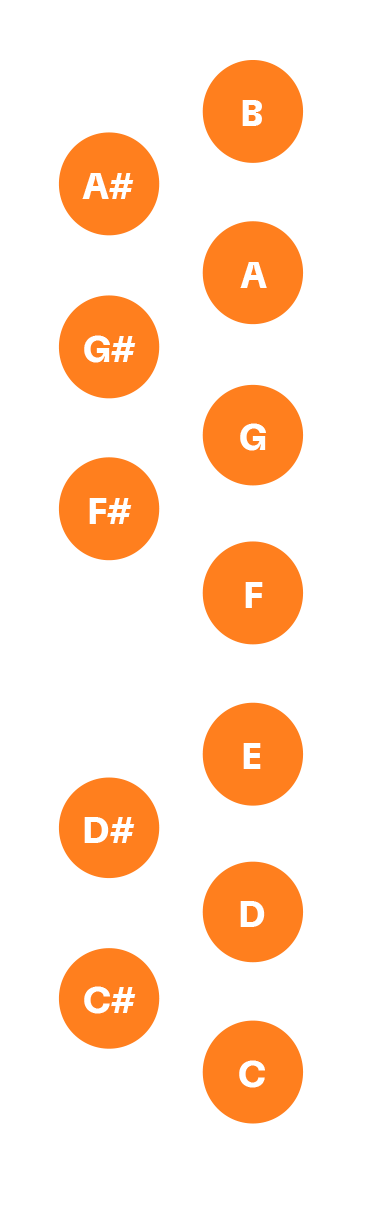
the 12 LEDs represent notes as displayed on a piano keyboard.
8.
Scale mode

there are 14 default scales.
they can all be edited.
scales are represented across the 12 LEDs as if the tonic note was always C.
when a scale is selected, oscillator 2 to 5 will only play notes within that scale (lit LEDs), if their scale switches are pushed right.
select scale on the tonic/scale switch to enter scale mode.
→ scale selection: turn notes to scroll through the 14 scales - press notes to confirm
→ scale edit:
↳ press and hold notes for 2 seconds to enter scale edit mode.
↳ turn notes to scroll through the scale - press notes to add or remove notes press and hold notes for 2 seconds to exit scale edit mode.
→ quick edit: press, hold, and turn notes left or right to remove and bring back the highest or lowest notes of the selected scale
→ tuning selection: press notes once to change tuning: equal temperament when the LED animation is going down, just intonation when it is going up
→ factory reset: press and hold notes for 6 secondes to erase all edits
9.
Tonic mode and
octaves

the tonic mode defines which note is played when oscillators 2 to 5 frequency sliders are all the way down, halfway, or all the way up.
select tonic on the tonic/scale switch to enter tonic mode
→ tonic note selection : turn the notes knob to select your tonic note - press notes to confirm. 3 octave range (3 ‘pages’ of LEDs)
→ linear transpose : hold down and turn notes to linearly change oscillators 2 to 5’ pitches altogether
→ detune mode:
↳ press and hold notes for 2 seconds to enter detune mode.
↳ scroll through oscillator 2 to 5 (the left column of the LEDs) to choose the oscillator you wish to detune - press notes to select
↳ turn notes to detune the selected oscillator - a gauge appears on the right column of the LEDs, indicating the level of detune (+/- 50cts)
↳ press and hold notes for 2 seconds to exit detune mode
→ factory reset : press and hold notes for 10 seconds to erase all edits
10.
Alter
filters
filters are used to shape your sound by attenuating specific frequencies or harmonics.
filter 1 and filter 2 are both stereo, and in series, meaning the output of filter 1 always goes into the input of filter 2.
→ cut: sets the frequency after which the filter attenuates high or low frequencies
→ resonance: boosts frequencies at the filter cutoff point
↳ if pushed all the way up, it self oscillates and creates a sine wave
→ lo/hi: crossfades the filter configuration between low pass and high pass
↳ turn left: low pass
↳ turn right: high pass
↳ noon: it scoops the mids
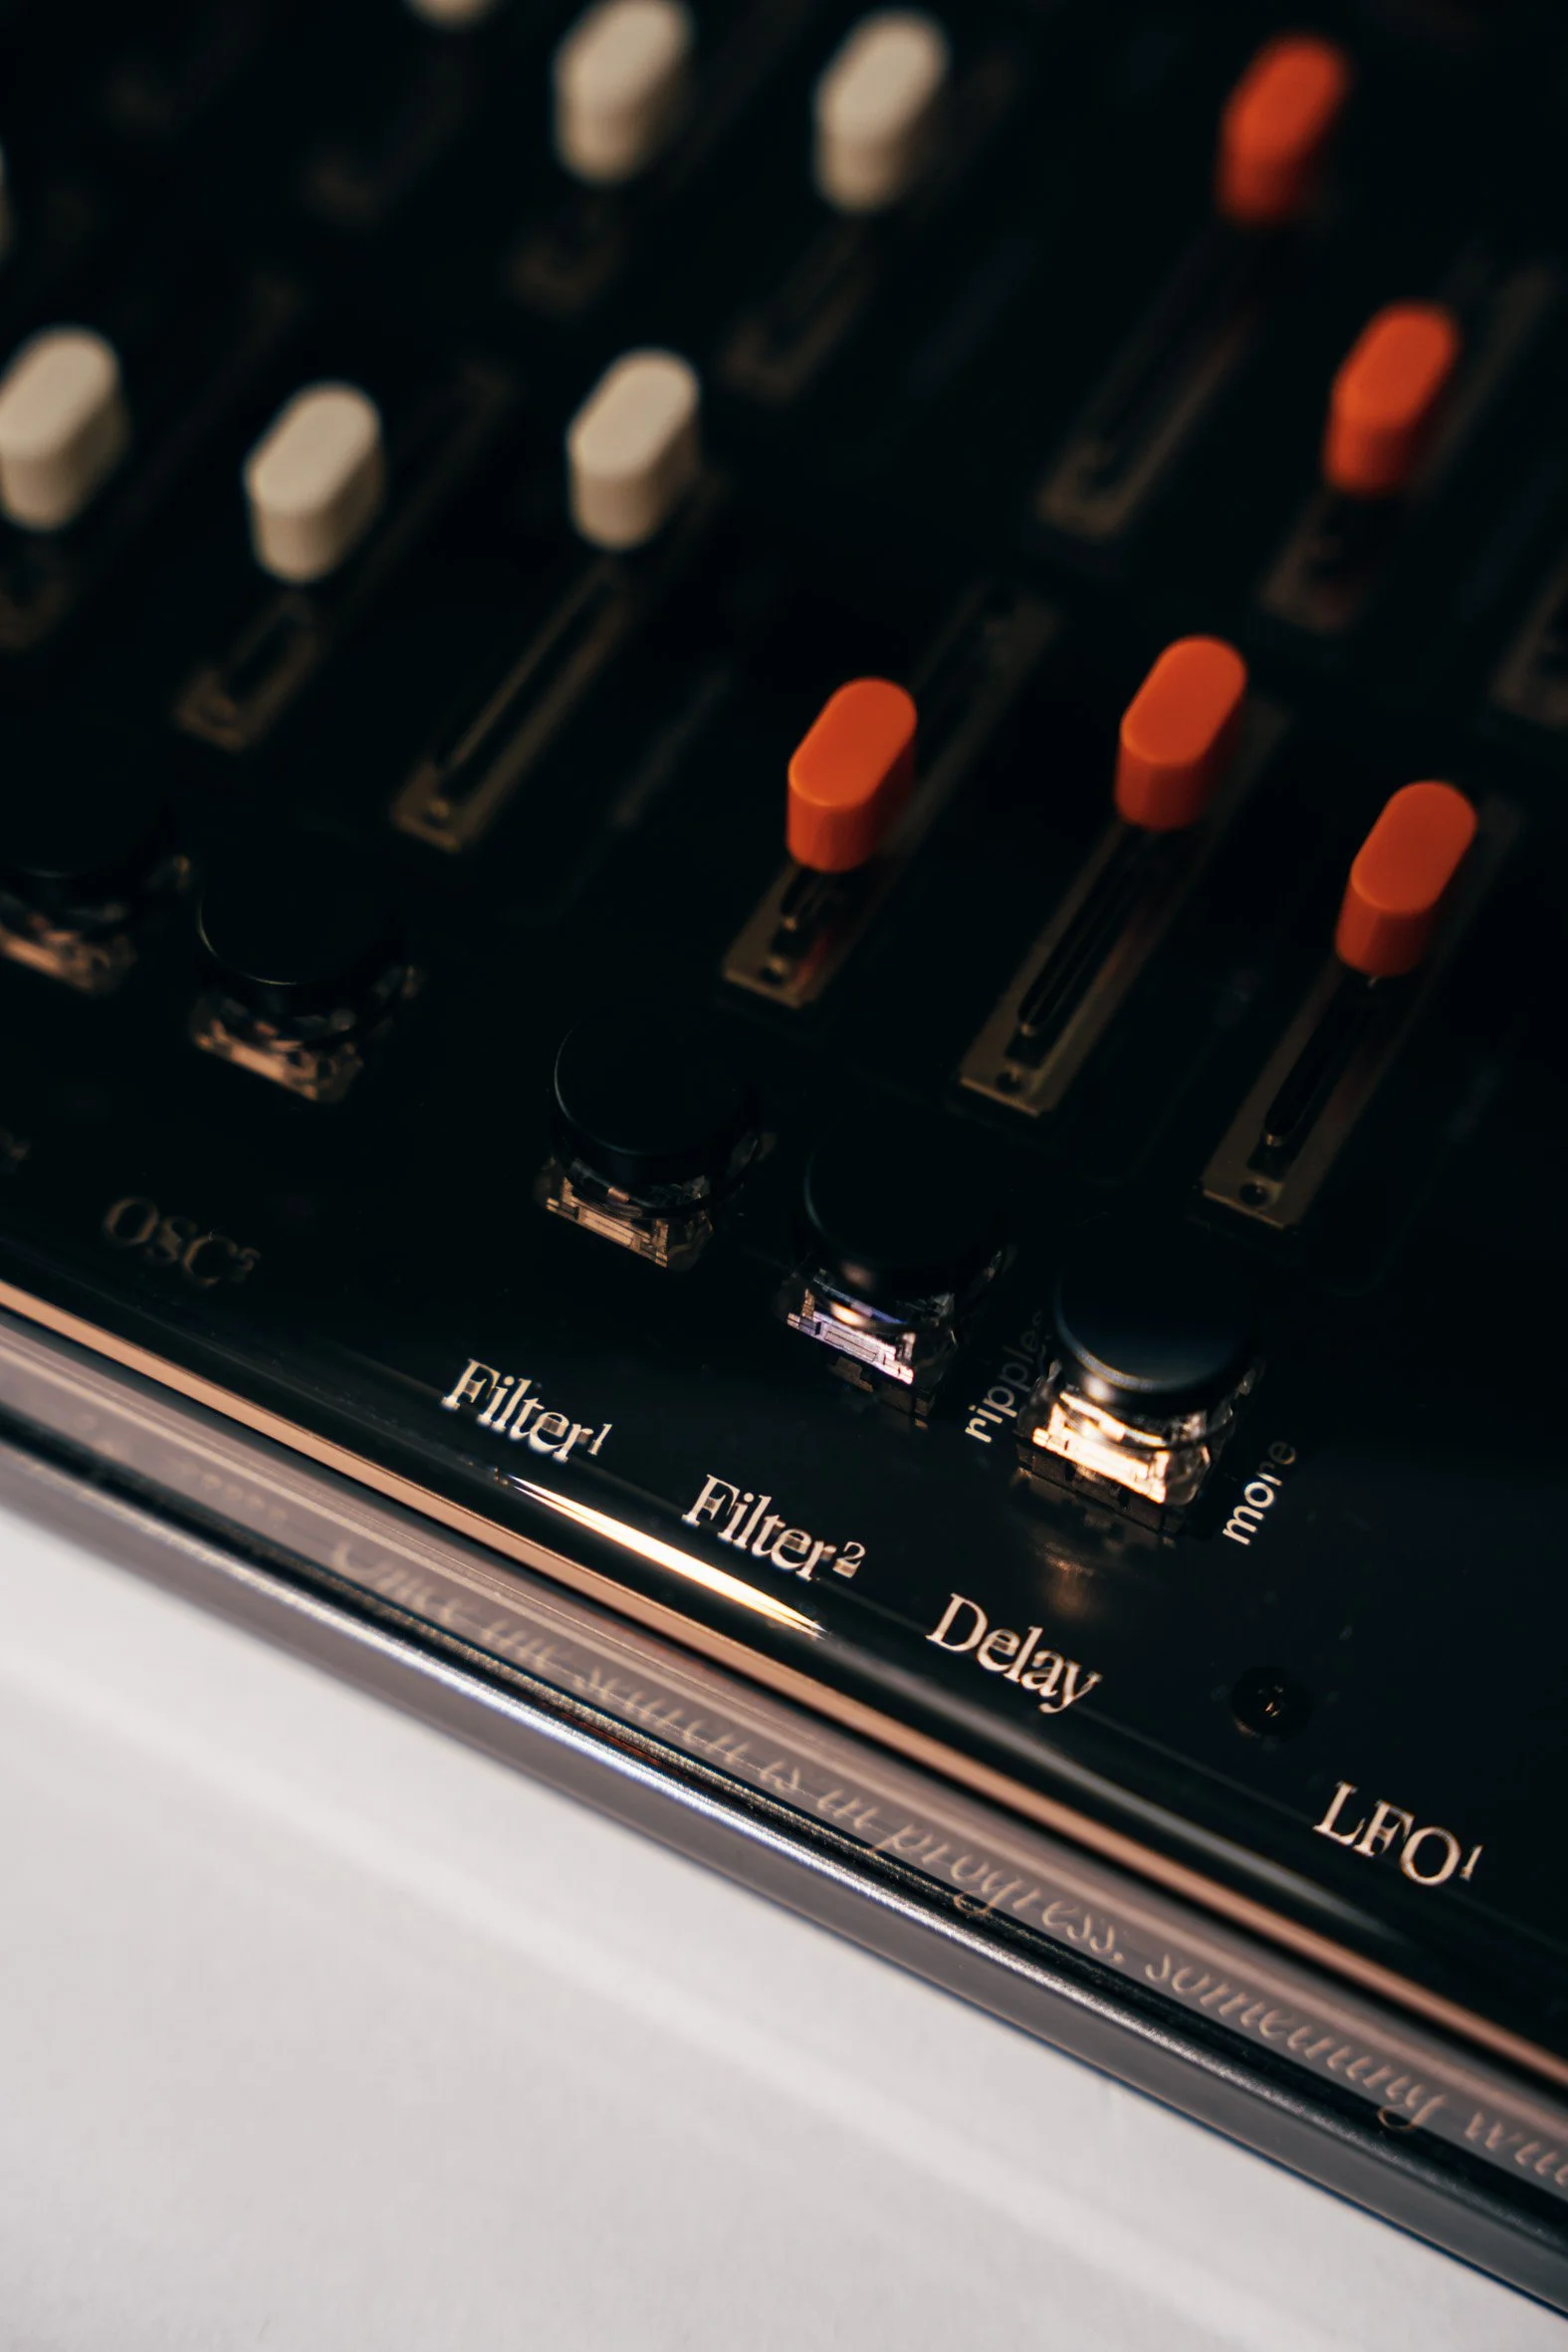
→ ripples (filter 1): temporarily modulates the filter cutoff frequency with the noise signal
→ ripples (filter 2): temporarily modulates the filter cutoff frequency with outline sources.
both ripples work best with some resonance.
delay
the delay is stereo. it records and plays back audio, creating echoes, giving space to your sound.
→ level: increases the volume of the repeated signal
→ feedback: sets the number of repeats from a single repeat to an infinite loop
→ time: sets the time period between each repeat
→ more: temporarily injects more audio signal into the delay
11.

Movement
this is where you assign the 4 modulation sources (LFO 1 & 2, Random, and Outline), to 1 or more of 19 destinations.
think of the modulation sources as 4 distinct waveforms that you can shape and control, and send to different parameters of ALT to create movement.
connect a modulation source (vertical columns) to a modulation destination (horizontal rows) with a pin to create movement.
if you send a triangle wave to an oscillator’s amplitude for instance, it’s like moving the amplitude slider up and down.
if you send a square wave, it’s like turning it on and off.
the light indicators on the matrix are useful to understand
how your modulation source is behaving.
12.
LFO 1 & 2
lfos create cyclical movements assignable through the pin matrix.
→ amplitude: sets the level of movement
→ frequency: sets the speed / tempo of the movement
→ range: changes the frequency range.
↳ low is 0.01Hz to 11Hz
↳ high is 0.7Hz to 1190Hz
→ shape: changes the waveform, morphing from square wave to triangle wave
midi clock sync:
if you send a midi clock to the usb-c port or midi TRS jack input, the midi clock will hardsync lfo 1 and lfo 2, meaning it resets their phase on each midi clock beat.
it works well if the lfo is slightly slower than the midi clock.
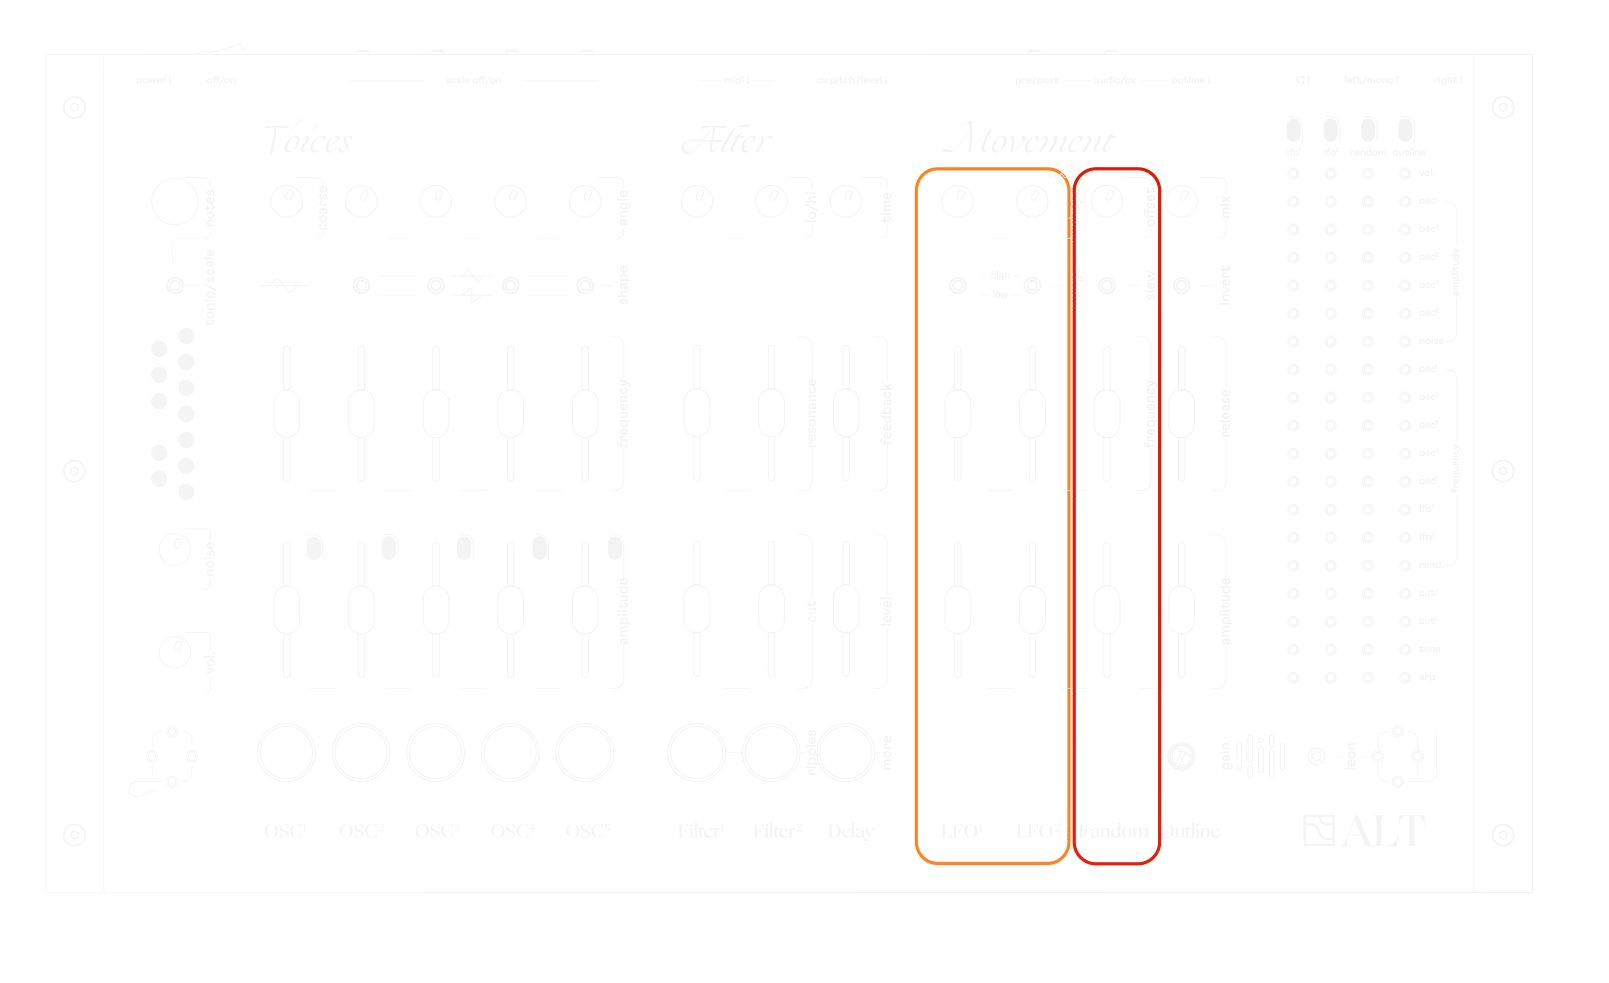
random - sample & hold
this modulation source creates random movements.
it is similar to a square wave but each step has a different, random amplitude.
→ amplitude: sets the level of movement
→ frequency: sets the speed / tempo of the movement
→ slew: smoothes out the transition between each step
→ offset: shifts the waveform of the movement higher or lower - normal position is noon
midi clock sync:
if you send a midi clock to the usb-c port or midi TRS jack input, the midi clock will take over the random frequency, turning the random frequency slider into a midi clock multiplier / divider.
13.
outline - enveloppe follower

outline creates a movement that follows different input signals:
the onboard microphone, the 5
oscillators' pushbuttons, or an external jack inputs (audio or cv).
→ gain: sets the microphone gain level
→ amplitude: sets the level of movement
→ release: gradually fades out the modulation signal after every input signal drop
→ invert: inverts the signal, either going up in the positive range, of down in the negative range
14.
outline - sources
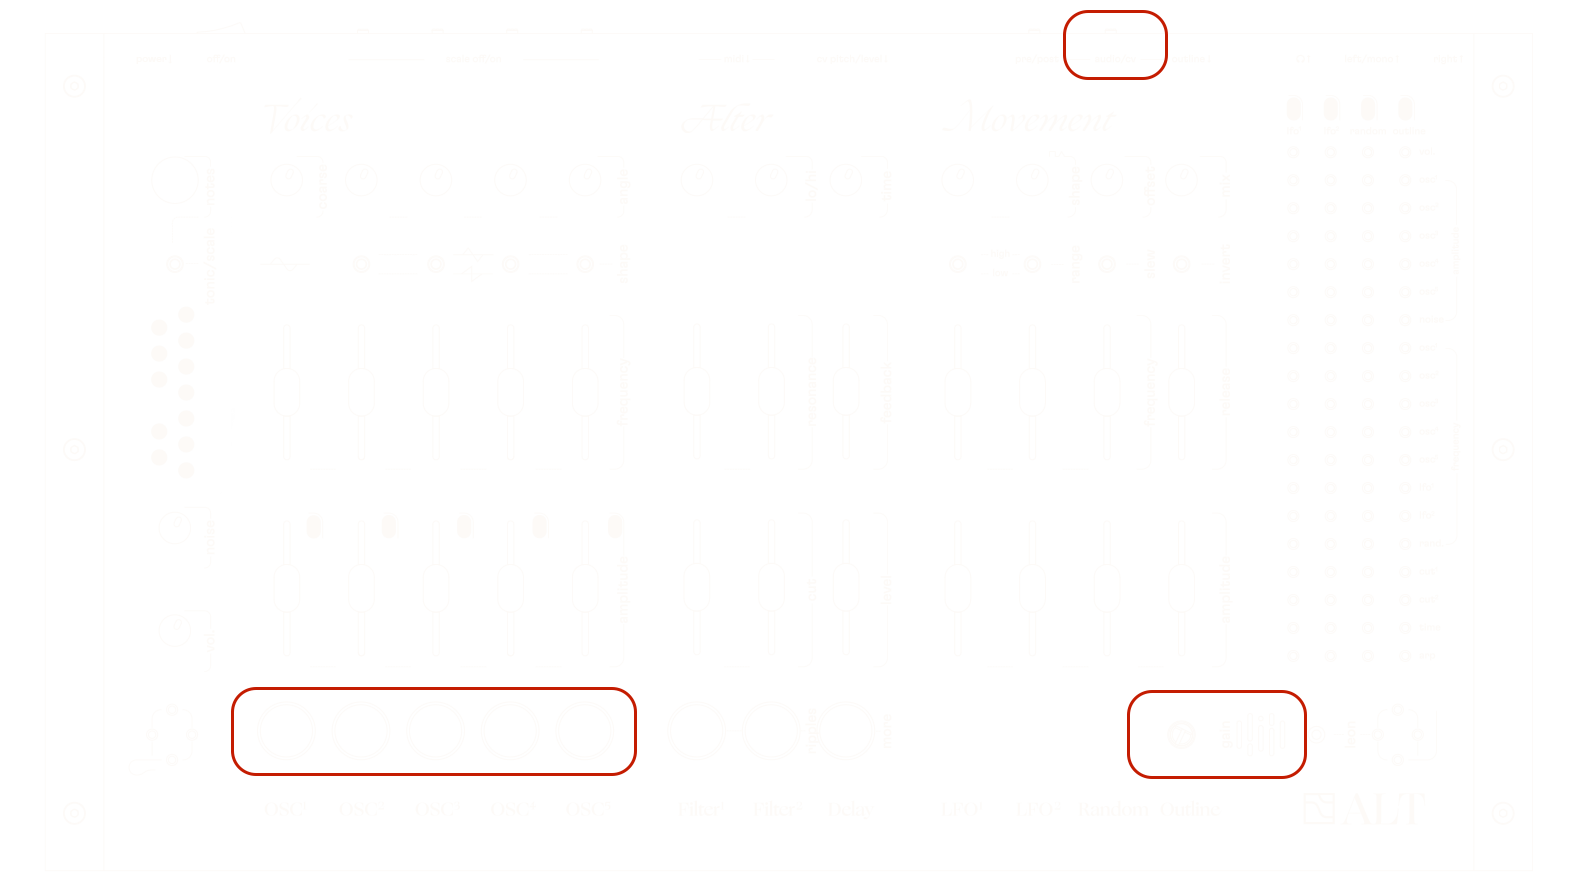
4 sources can feed outline.
→ onboard microphone: select audio on the audio/cv switch, and do not plug anything into the out line jack input
→ pushbuttons: select cv on the audio/cv switch, do not plug anything into the outline jack input, and trigger the oscillators’ gates (either with the pushbuttons, or midi, or even with arp)
→ external audio source: select audio on the audio/cv switch and plug an audio source into the out line jack input (groovebox, synth, phone, tape...)
→ external cv source: select cv on the audio/cv switch and plug a cv source into the outline jack input (eurorack, keyboard, sequencer...)
15.
outline - mixer
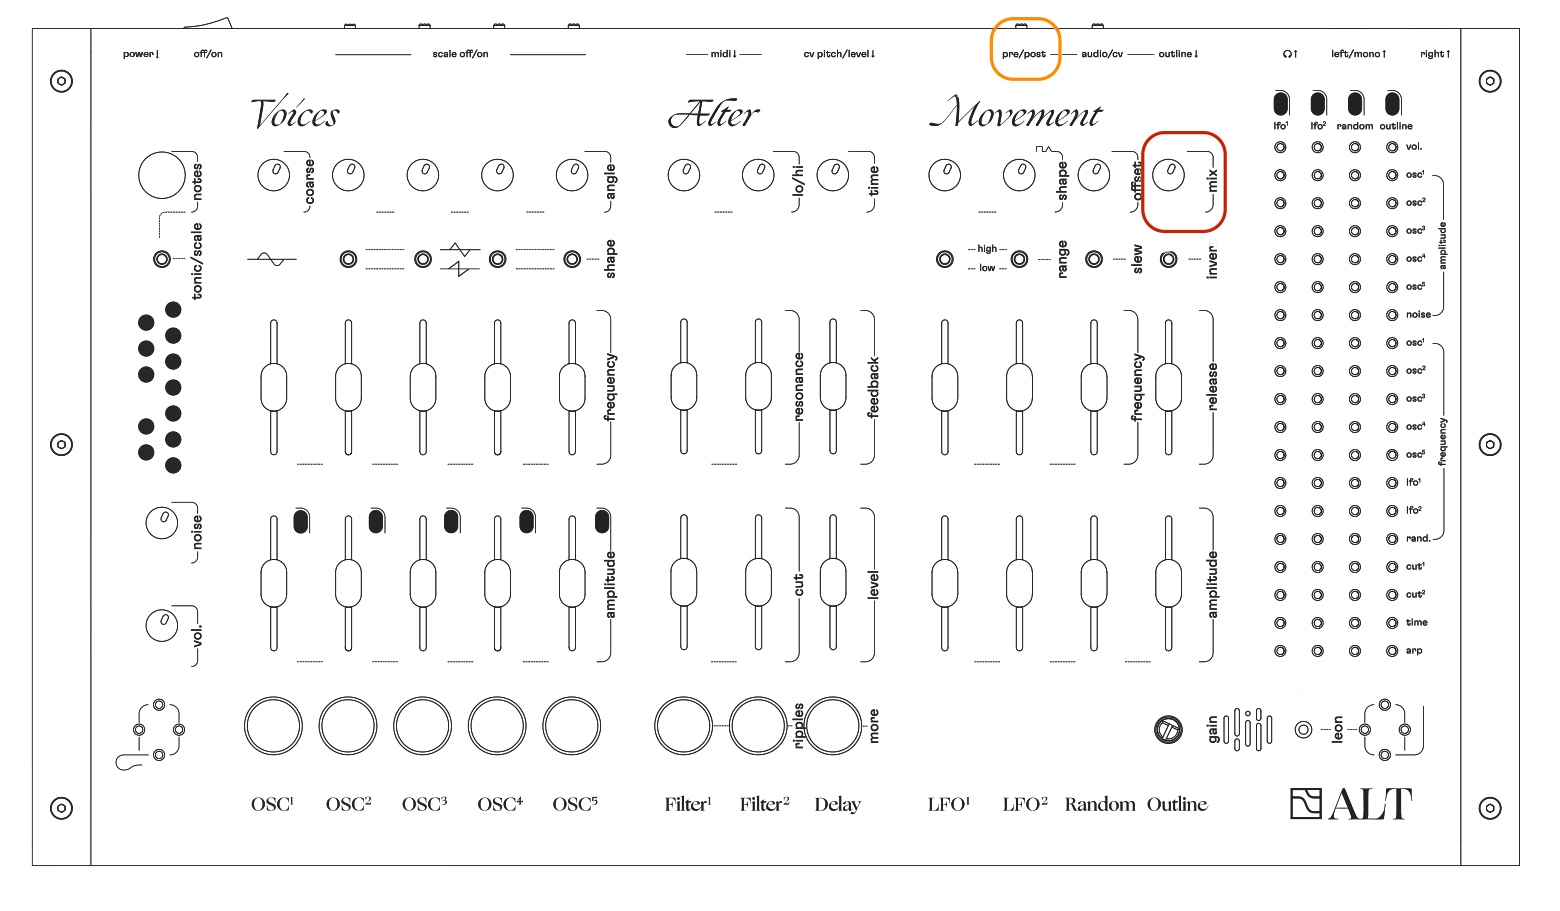
ALT can be used as a mixer, or as an effects processor.
mix knob :
→ mix sets the amount of outline audio input signal (microphone or audio jack) you want to hear through ALT’s audio output
important: set the audio/cv switch to audio, otherwise you’ll hear cv clicks.
pre/post switch :
→ pre: outline input signal is mixed with ALT’s main audio output before Alter (filters and delay), turning ALT into an effect pedal
→ post: outline input signal is mixed with ALT’s main audio output after Alter
16.
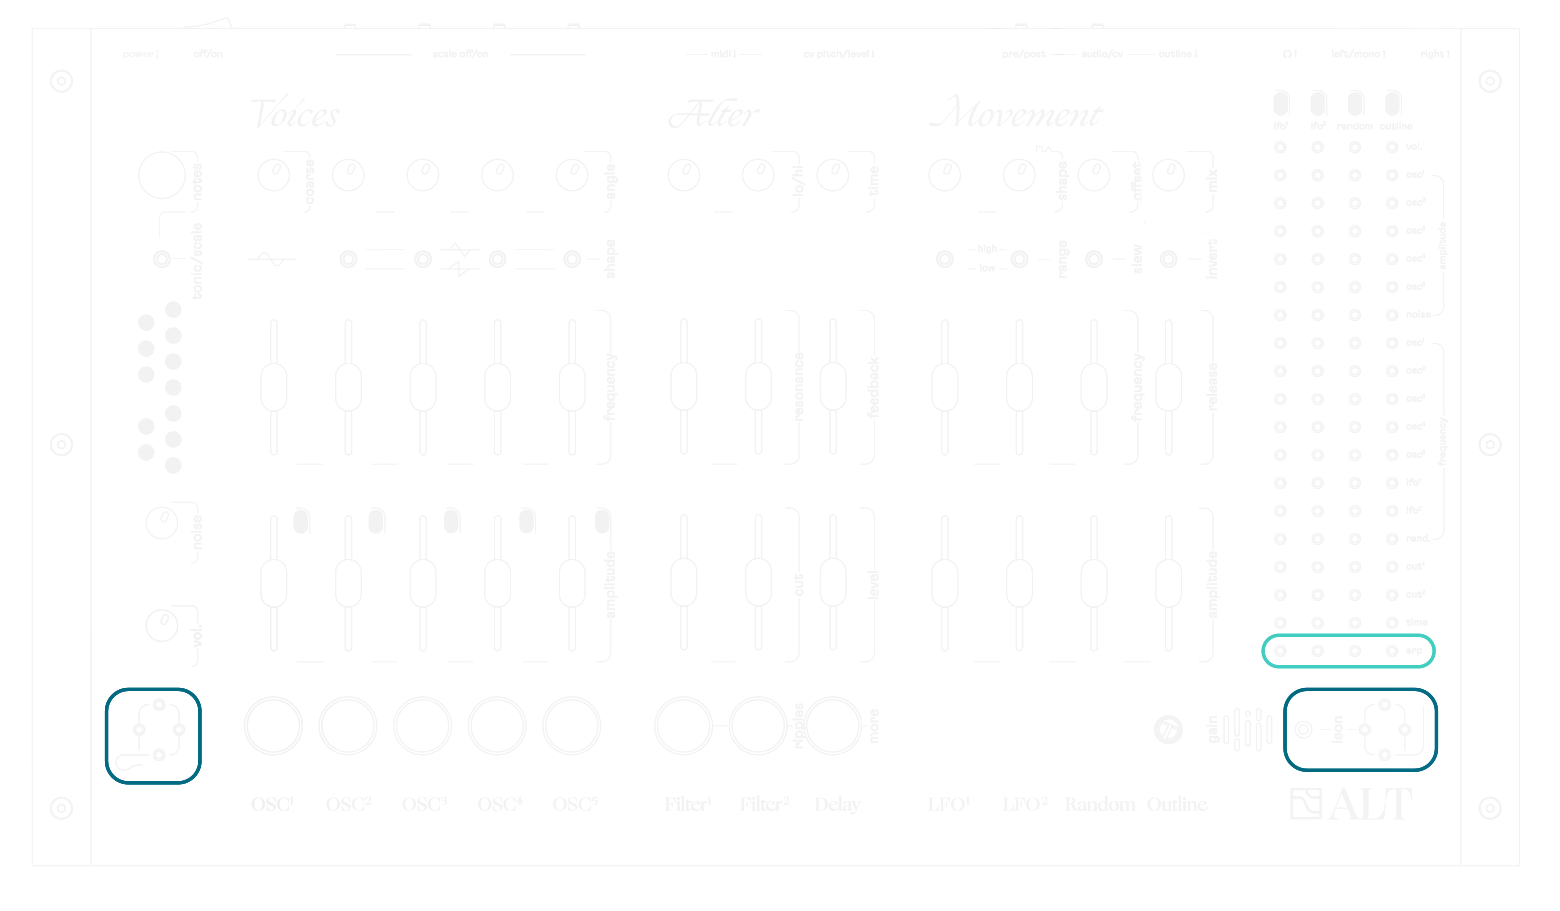
ARP is the only modulation destination (matrix row) that does not refer to a knob or slider.
it simulates a strange sequencer: tempo is set by the modulation frequency, and oscillators 2 to 5 are triggered in different orders depending on the modulation shape and amplitude.
it works best when oscillators amplitude levels are down.
try connecting different modulation sources to arp, you’ll be surprised.
arp
leon
ALT can be turned into a Theremin.
flip the leon switch (up) to activate the 2 light sensors, and modulate ALT’s sound by playing with shadows above the sensors.
the left sensors control master volume and the right sensors control frequencies of oscillators 2 to 5.
try turning the scale on/off switches on and off for different effects.
17.

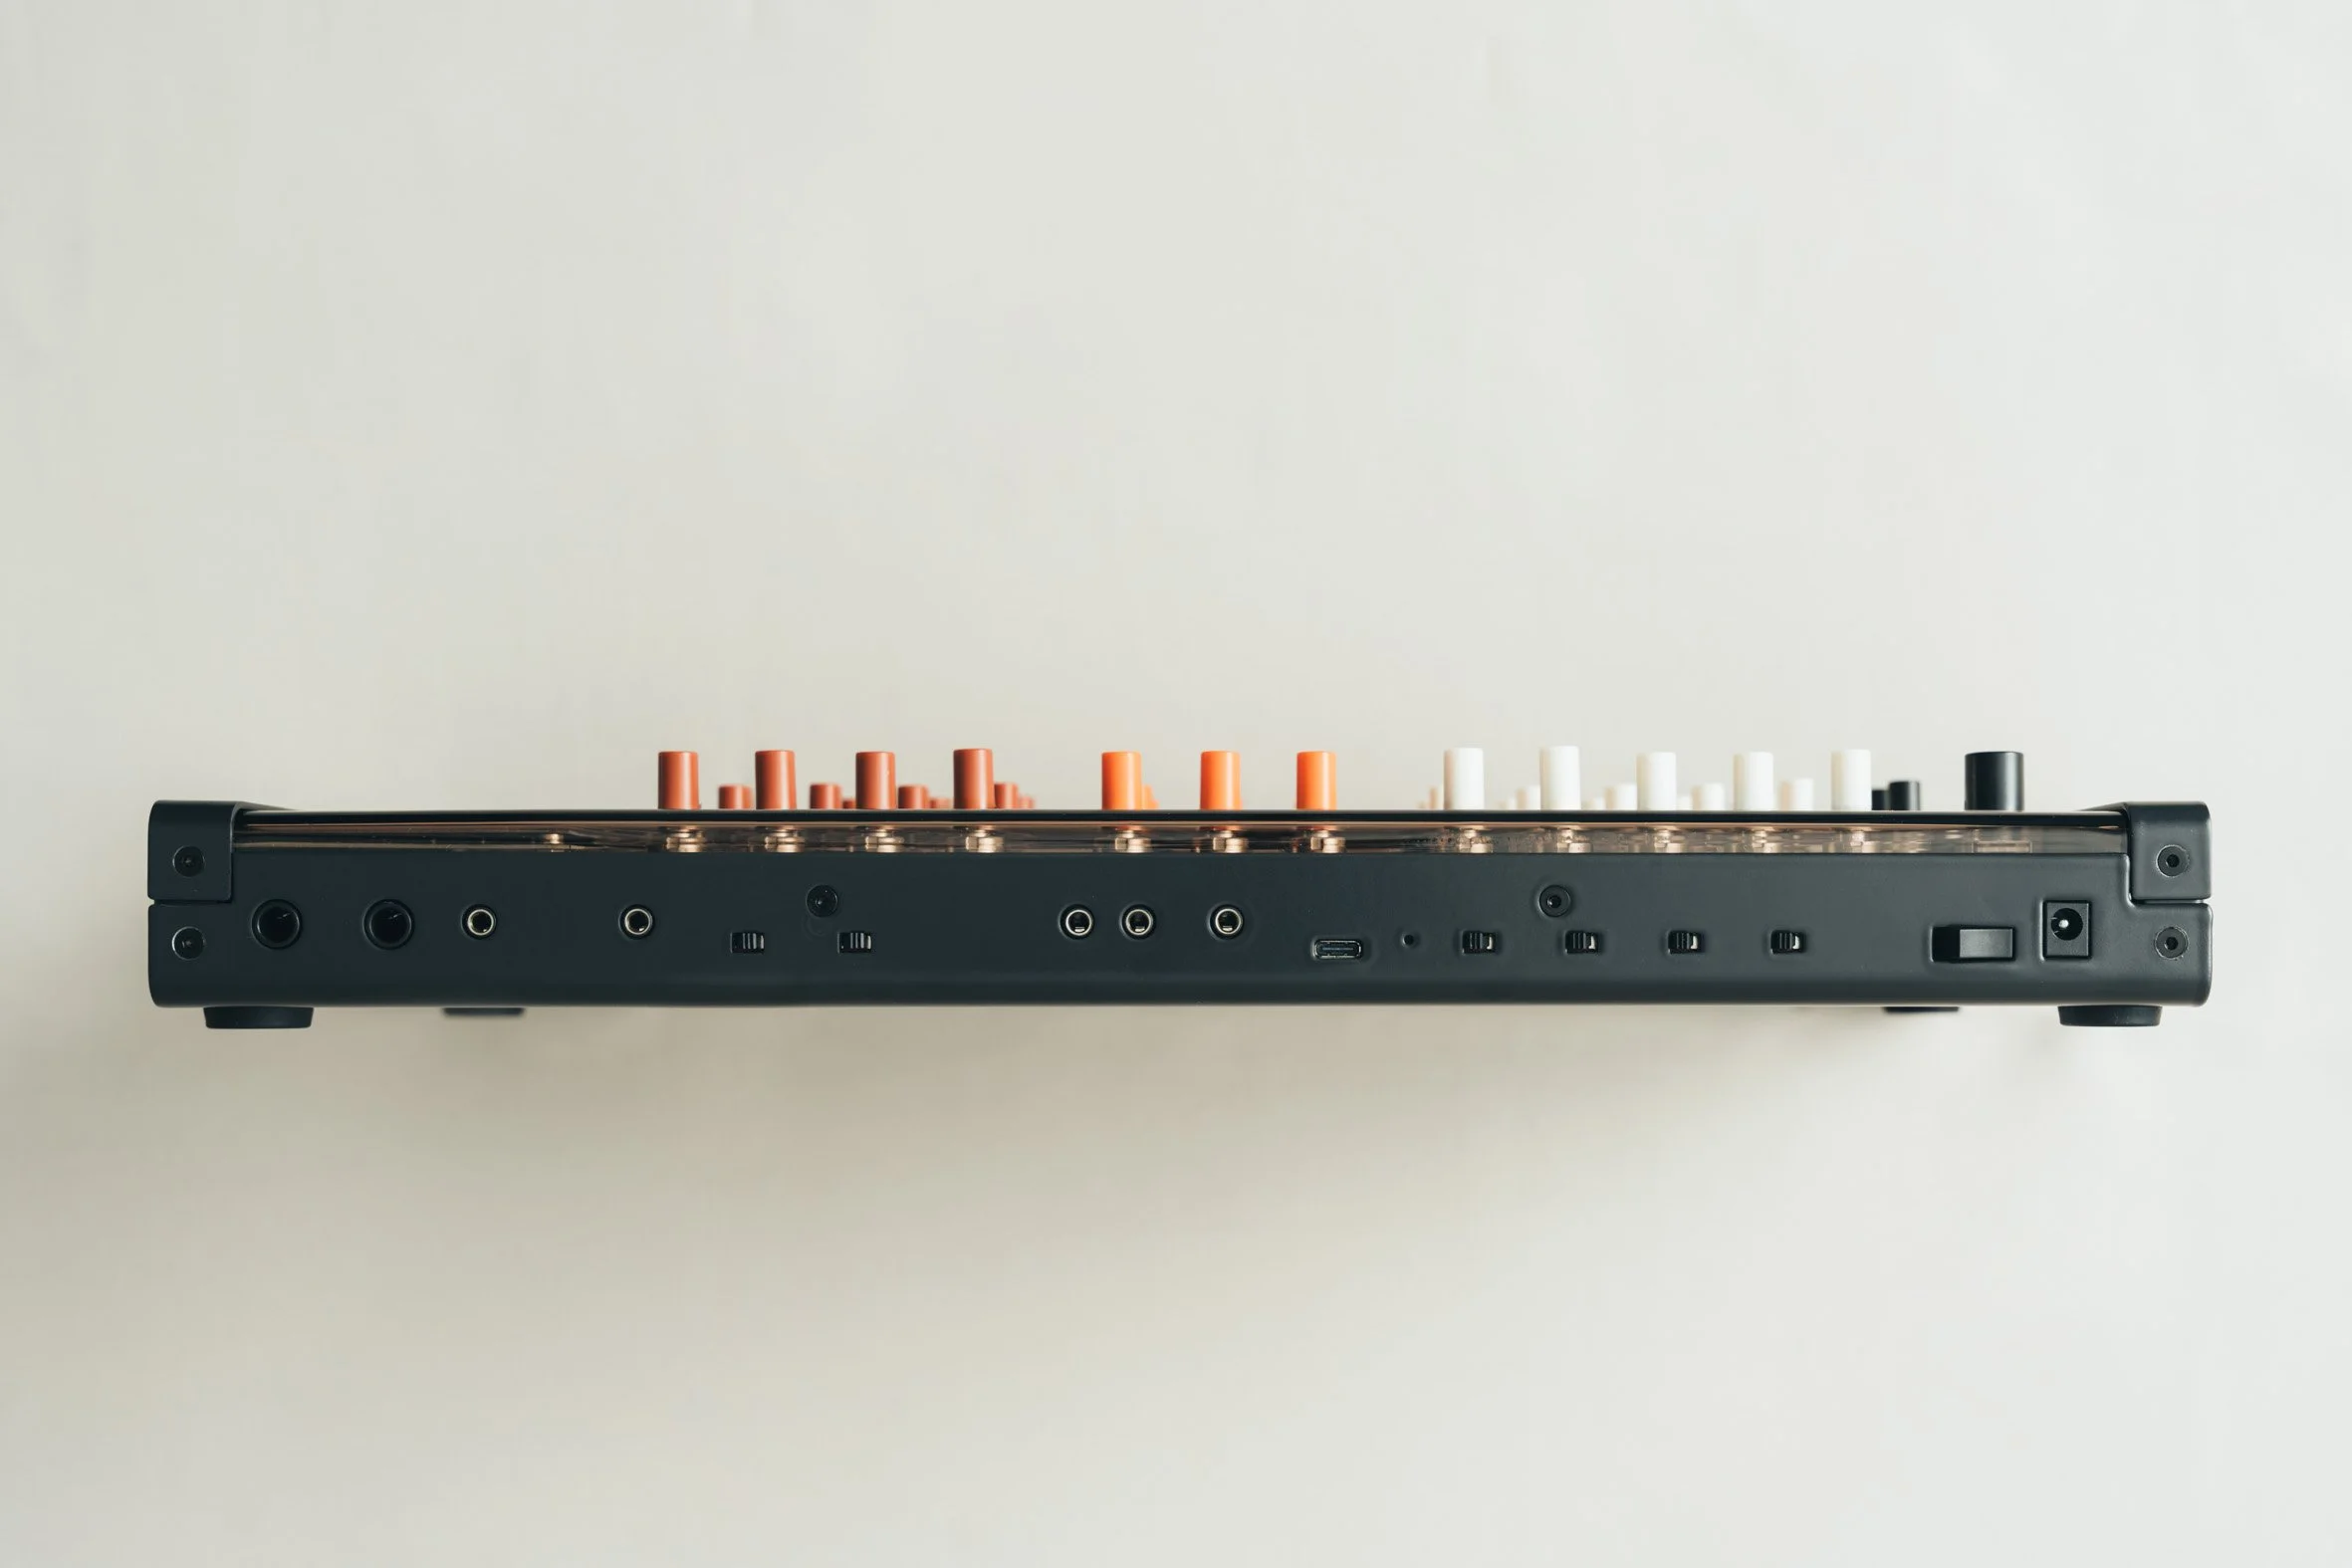
Connectivity
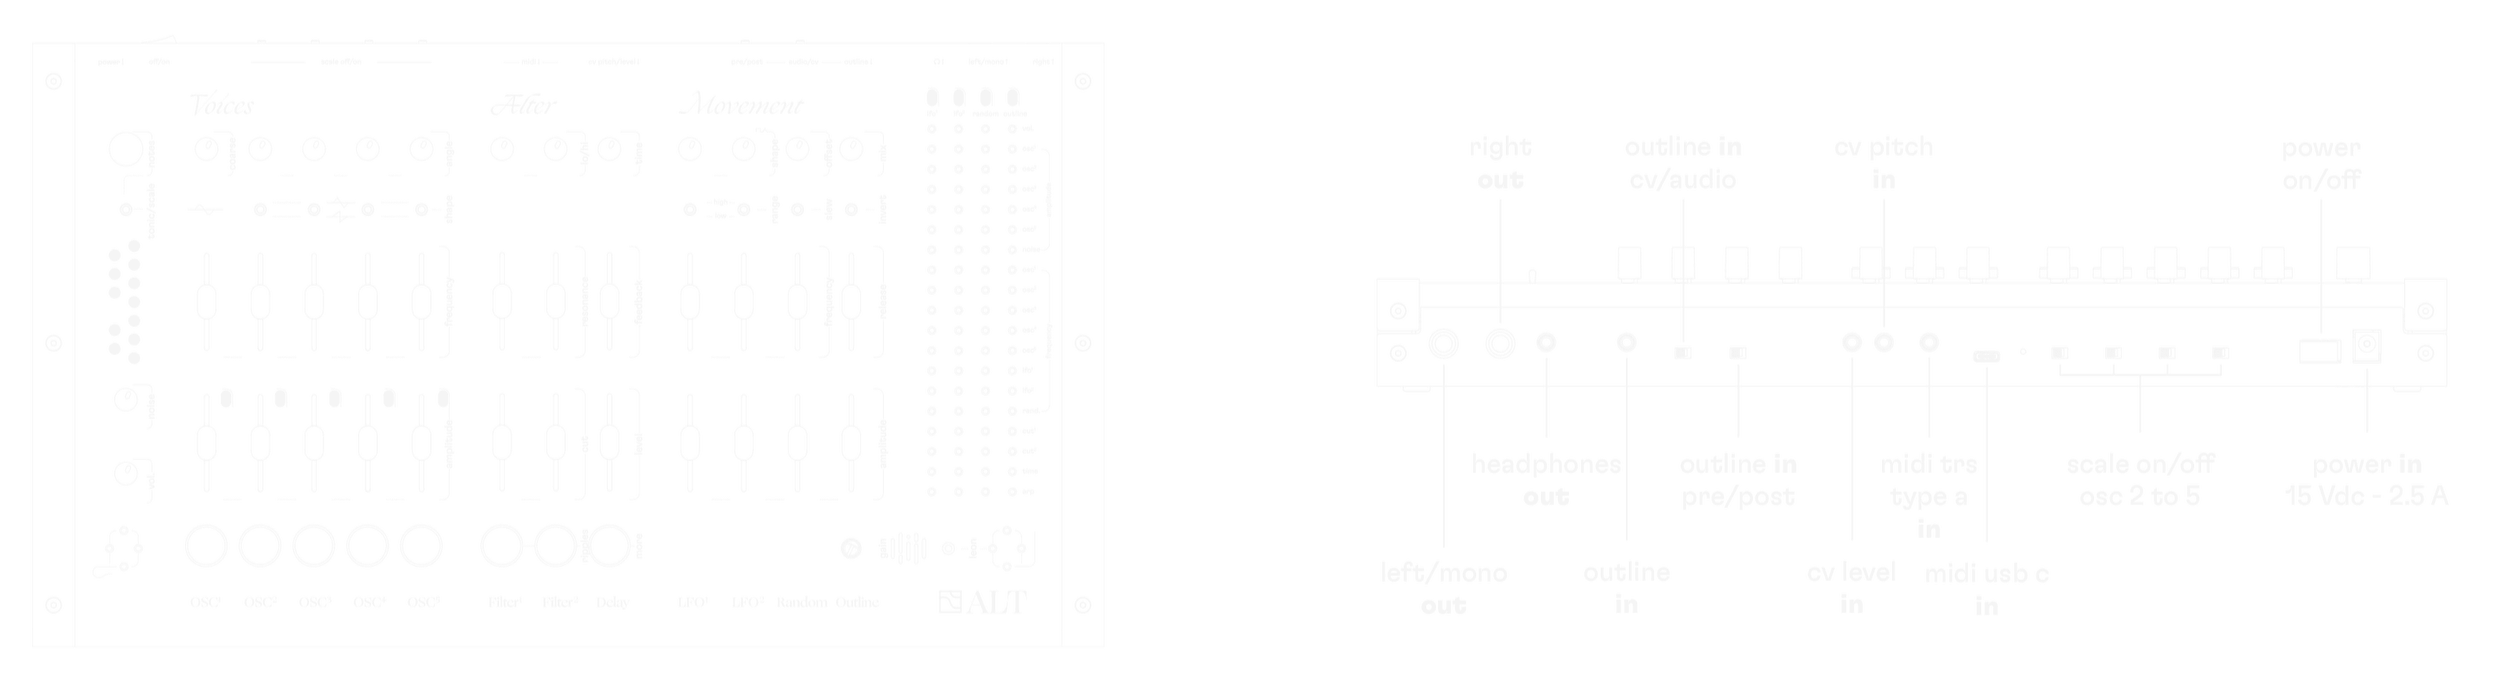
inputs
power input
110-220V AC / 50-60Hz > 15Vdc 2.5A
DC plug : 5.5 x 2.5 x 10mm, center positive
MIDI input
usb-c and jack trs (type a) input - you can use both - it works the same.
for midi modes and behaviors, go to page 52.
CV pitch
3.5mm jack TS
±5V input signal
use a CV controller or sequencer to control the frequencies of oscilla tors 2 to 5.
it follows the 1 volt / octave standard.
CV level
3.5mm jack TS
±10V input signal
use a CV controller or sequencer to control the amplitude of all 5 oscillators.
choose which oscillators are affected by cv level by raising their amplitude sliders.
18.
Connectivity
outputs
right output
mono 6.35mm jack TS
left / mono output
mono 6.35mm jack TS
if nothing is connected to right, left and right signal will be mixed to this output.
headphones output
stereo 3.5mm jack TRS
19.

MIDI modes
ALT can receive note, velocity, aftertouch, and pitchbend midi messages. only oscillators 2 to 5 are affected by MIDI.
midi pitch messages don’t behave on ALT like they do on other synths, because of tonic note settings as well as oscillator’s frequency slider positions and the modulation matrix.
midi pitch messages will create pitch offsets (transpose) on top of these prior settings, depending on the midi channel selected.
MIDI channel 1
voice splitting mode : 4-voice polyphony.
every time a midi note is sent to ALT, it triggers one oscillator after the other.
midi notes in voice splitting mode create different pitch offsets for each oscillator, based on the tonic note selected, using C as the reference on a midi keyboard.
for example, when the oscillator frequency slider is down, and the selected tonic note is F, if you play a C on a midi keyboard, you will hear an F.
important: if you want each midi key to play its corresponding note (as represented on a piano), you need to select the tonic note C, and also set the oscillators 2 to 5 frequency sliders to the same note, at the same octave:
oscillator 2 all the way up, 3 and 4 halfway, and 5 all the way down.
↳ click notes once on a new tonic note to transpose oscillators 2 to 5 while keeping their individual midi pitch offsets
↳ click notes twice (while in tonic mode) to erase all voice splitting midi offsets
MIDI channel 2
monophonic transpose mode with note on/off and velocity.
oscillators 2 to 5 are played together monophonically.
unlike in voice splitting mode, midi notes are absolute.
this means that when you play a B on a midi key board, you will hear a B no matter what the tonic note is - as long as your oscillators' frequency sliders are on the tonic (up / halfway / down).
MIDI channel 3
transpose mode without note on/ off.
similar to midi channel 2 but without triggering the oscillators' amplitude.
set the oscillators' volume directly on ALT, and transpose them with midi.
MIDI clock
→ midi clock will take over the random frequency, turning the random frequency slider into a midi clock multiplier / divider
→ midi clock will hardsync lfo 1 and lfo 2, meaning it resets their phase on each midi clock beat.
it works well if the lfo is slightly slower than the midi clock.
MIDI oscillators selection
sometimes you want some oscillators to be played with the matrix, and others to be played with midi.
to choose which oscillators are affected by midi (for all midi modes / channels), there is a hidden menu:
press and hold down the notes knob, and flick the tonic / scale switch twice. you will see a special animation on the 12 LEDs below the switch.
the left LED column represents oscillators 2 to 5.
you can browse with the notes knob and click on each oscillator to enable or disable them (if the LED is dimmed, midi will not affect this oscillator).
exit this menu by flicking the tonic / scale switch once.
20.
Troubleshooting
no sound when you turn on ALT for the first time?
make sure:
→ ALT is turned on (LEDs are lit up)
→ jack outputs are connected to speakers (and speakers are on), or headphones output is connected to headphones (or speakers)
→ master volume is turned up (bottom left of ALT)
→ at least one oscillator’s amplitude slider is pushed up (if oscillator 1, turn up its frequency as well, as the low frequencies can be out of our hearing range
→ both filters hi/lo settings are turned left
→ both filters cut sliders are pushed all the way up
is ALT sounding weird? want to start over with a clean tone?
→ switch off leon (down)
→ turn down the outline mix level (or else you’ll hear the microphone signal or clicks if audio/cv switch is set to cv)
→ turn down the noise level
→ turn down the filters' resonances
→ turn down the delay feedback
→ take out a few pins
microphone not working?
if a jack is plugged in the outline jack input, it’s normal. it’s one or the other.
random not working?
→ set the offset knob in the middle (noon)
leon not working?
→ you need more light.
modulation too intense ?
→ don’t forget you can attenuate the modulation sources' amplitudes. it works even when the slider is slightly up.
tuning is off ?
ALT’s tuning can be sensitive to temperature changes.
if you have time, wait 30 minutes after turning it on so it warms up.
if you are in a hurry, you can use the detune mode to adjust the tuning for each oscillator.
if ALT is still out of tune after 30 minutes (without having changed the detune settings), you can try to re-calibrate ALT (every unit has been calibrated by us during assembly).
the calibration procedure is here: www.cymaforma.com/alt/calibration
21.
Cool tips
create simple drum patterns
create a quick sidechain effect
create waves sound
22.
Safety instructions and warnings
read these safety instructions before using your new product from cyma forma.
keep these instructions for future reference.
this document contains important safety information.
please follow all instructions given.
WARNING: RISK OF FIRE AND ELECTRIC SHOCK
→ failure to follow the instructions in this document may result in fire or electric shock, causing property damage or personal
→ do not expose the device to rain, moisture, dripping or splashing and also avoid placing objects filled with liquid, such as vases, on the device.
→ do not expose the device to direct sunlight or use it in an environment where the temperature exceeds 35°C, as this may cause the device to malfunction.
→ do not remove the casing on this product. there are no user-repairable parts inside this product.
refer all servicing and repairs to qualified service personnel.
→ do not exceed the limitations specified in the electrical specifications.
SAFETY INSTRUCTIONS FOR THE USE OF POWER ADAPTERS WITH OUR PRODUCTS
only use the provided AC adapter power supply with the correct input voltage rating, DC output voltage rating, voltage polarity and DC current rating as specified on the product.
USER AND MAINTENANCE INSTRUCTIONS
→ do not expose this product to water, direct sunlight, moist, dusty, or other extreme environments.
→ do not use this product near heat sources such as radiators, ovens, or amplifiers.
→ unplug all cords, including the power cord, during thunderstorms.
→ do not use flammable substances such as alcohol or petrol near this product.
→ for all servicing, repair needs or advices, please refer to cyma forma to provide instructions
→ do not remove the casing on this product. There are no user-repairable parts inside this product.
→ use this product on a stable, flat surface.
→ do not use this product or the sounds you create with it in such a way that it risks harming your hearing, or risks harming the hearing of others.
→ to reduce the risk of fire, do not cover or enclose this product when it is turned on.
→ this product is not safety grounded and only approved for indoor use or in a similar environment.
23.